Story Fourteen
Cloud Cuckoo Land
Phasing out the use of
tools
In our Literacy
project ‘Cloud Cuckoo Land’ we came up with an idea that it
would be great that children would create their own land using wooden
bricks and paint. After a disastrous attempt to have a creative art
session that resulted in a wet floor, blotchy wooden bricks, really
colourful school uniforms, and a distressed teacher, I gave up on the
idea of using colours and water (they are on
my black list now along with glitter and
glue) and decided to provide children with the alternative to create
their virtual land using SMART amp.
Believing in the
creator’s soul in every child and the power of creative team work,
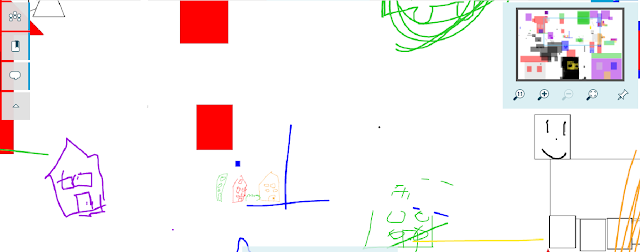
I simply set up a blank workspace, had a fruitful discussion about
our expectations and let children’s muses talk. I was unpleasantly
surprised to observe an ultimate artistic mayhem full of yells of
disapproval, complaints and bitter remarks. It was so due to the fact
that children had naturally chosen to use pens and I
hadn't anticipated the possible dangers, which are following:
- Children love doodling vigorously to warm up before painting
- They panic when somebody else's line appears close to their
- They try to immediately remove anything that disrupts their drawing
- The excessive use of the eraser results in disappointment and recurring blank workspace
Despite knowing that
working in a virtual workspace requires high-level collaborating
skill, I forgot to get the children used to three basic aspects of
dealing with a workspace:
- keep calm when an object appears near yours or even overlaps it If you don't react immediately (I'm avoiding the word panic), the other creator is more than likely to remove it soon.
- Start with the larger elements of the workspace and gradually get to the finer details
- When you are happy with your creation, lock it and possibly leave a note letting the others know that the object should be considered completed. This can be deemed the golden rule.
 |
| The first version |
The next session we
talked about the reasons why our design did not meet our expectations
(we also review rules for creative dialogue and giving instructions)
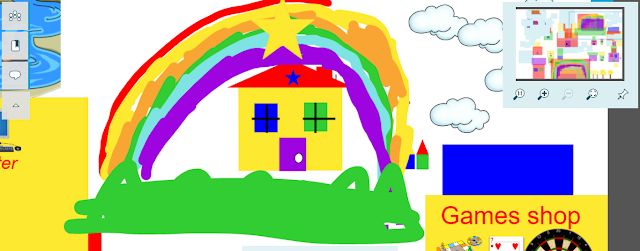
and agreed on three steps to create another design. The step that
lead to a successful design were following:
- One – insert only objects and lines
- Two – insert images, either from the Internet or camera
- Three – finalise the design with a pen or highlighter
 |
| The second version |
In the end, we all
experienced time full of creative excitement that lacked confusion
and disappointment and it was really great to see how proud the
children were when they presented their workspace to their peers.
No comments:
Post a Comment